I love to entertain and try new recipes. This is a way for me to share some of the recipes I have tried and what I have thought of them. I hope you enjoy it and let me know if there are some recipes you would like me to try.

Sunday, 26 August 2012

Cranberry Orange Muffins

I love the combination of cranberries and oranges, the flavours blend so well together.  It is almost like they were meant to be joined together in baking because they complement each other beautifully. 
This is a fairly healthy muffins proving to be a good source of both fiber and vitamin C.  As I have said before I love having muffins in the freezer to pull out for a quick breakfast or a snack before running out the door.

Cranberry Orange Muffins

1 1/4 cups bran cereal
1 1/3 cups low fat plain yogurt
1 egg
1 tbsp orange zest
1/2 cup orange juice 
1/2 cup honey
1/4 cup vegetable oil or apple sauce
2 cups whole wheat flour
2 tsp baking powder
1/2 tsp baking soda
1/2 tsp salt
1 cup cranberries
  1. Preheat the oven to 375F and lightly grease or line a muffin tin.
  2. Combine the cereal and yogurt in a mixing bowl and let it sit for 5 minutes.
  3. Add in the orange zest, orange juice, honey and vegetable oil and stir until mixes well.
  4. In a separate mixing bowl, combine the dry ingredients and cranberries.  Stir in the wet ingredients until just mixed, it should still be lumpy.
  5. Spoon into the muffin tins.
  6. Bake for 25 minutes or until they have set and the tops are golden.


Thursday, 23 August 2012

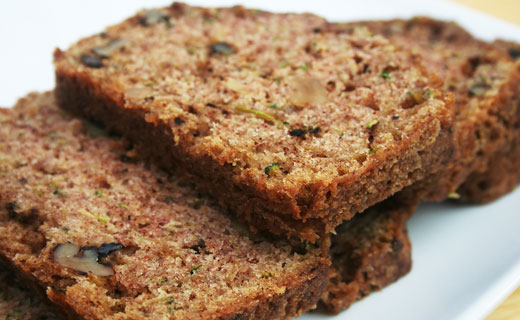
Cheesy Zucchini Bread

Here is yet another way to use up some of the summertime zucchini goodness.  The zucchini helps keep the bread nice and moist.  I really enjoy this bread and I think it is a perfect match with some nice soup in the winter.  In the summer I will make a bunch to put in the deep freezer and take it out throughout the winter when I make soups at least once a week. It tastes great on its own, warmed with some butter.

Cheesy Zucchini Bread

3 cups flour
1/2 cup sugar
1 tbsp baking powder
1 tsp sea salt
1/2 tsp baking soda
2 tsp onion flakes
1 cup grated zucchini
1/3 cup melted butter
2 eggs, beaten
1 cup butter milk
3 tbsp parmesan cheese, plus extra for sprinkling on top
  1. Preheat the oven to 350 F. Grease and flour a 9"x5" loaf pan or some mini loaf pans.
  2. Combine the toasted onion and grated zucchini, allow it to sit for at least 10 minutes.
  3. Combine and mix together the dry ingredients.
  4. Stir in the eggs, butter and butter milk and parmesan cheese into the flour mixture.  Add the zucchini mixture and stir until just combined
  5. Pour into the loaf pan(s) and sprinkle the tops with extra parmesan.
  6. Bake for 50 - 65 minutes for a regular loaf and 25-35 minutes for mini loafs.  (It is ready when it passes the tooth pick test)

Wednesday, 22 August 2012

Christmas Relish

Well right now I almost have more zucchinis than I care to deal with but I have lots of recipes I would like to try and only a limited amount of time when I have an ample supply of them from the garden.  When I found this recipe in my zucchini cook book I knew it was a perfect on for me to try because at Christmas I like to give my family home made gifts.  I am very happy with how it turned out and I am sure once I gift it I will get requests for more!  This is another great recipe of

Christmas Relish

12 cups grated zucchini
2 grated green peppers
2 chopped red peppers
4 cups coarsely chopped onion
1/3 cup pickling salt
1 tsp turmeric powder
1 tsp curry powder
1 tsp celery seed
1 tbsp corn starch
1/2 tsp pepper
3 cups vinegar
4 1/2 cups sugar

Day 1

  1. In a large bowl or pan mix together the prepared vegetables and pickling salt.  Let stand overnight.

Day 2

  1. Drain the vegetables and rinse with cold water.
  2. Mix together the rest of the ingredients into a large pot.
  3. Add the vegetables and boil for 20 minutes.
  4. Pour into sterilized jars and seal.

Tuesday, 21 August 2012

Zucchini Relish

Zucchinis are great and easy to grow as long as you don't have too many slugs around.  A problem some people face if finding enough different recipes to use them in, especially the monster baseball bat ones.  Last year I started making Zucchini Relish and I was not able to make enough of it to keep my family satisfied throughout the year.  Personally I am not a huge fan of relish in general unless it is on a hotdog or hamburger but my family will eat it will bread, crackers or cheese.  I hope you enjoy it as much as they do.

Zucchini Relish

4 stalks celery, chopped
10 cups grated zucchini
4 large onions, chopped
1 red pepper, chopped
1/2 cup pickling salt
3 cups vinegar
3 1/4 cups sugar
2 1/2 tbsp celery seed
2 1/2 tbsp mustard seed
2 tsp turmeric powder
2 tbsp corn starch
1/2 vinegar

Day 1

Combine the vegetables and pickling salt in a large stainless steel bowl or pan.  Let them sit overnight.

Day 2

  1. Drain the vegetables and rinse them well.
  2. In a large pot bring the vinegar (3 cups), sugar and seasonings to a boil.
  3. Remove from heat and add the vegetables.  Let it stand for two hours.
  4. Return to the stove and bring to a boil.  
  5. Dissolve the cornstarch in vinegar (1/2 cup) and add it to the boiling mixture.  Allow everything to simmer for 15 minutes.
  6. Spoon into sterilized jars and seal.
  7. Process in a water bather for 20 minutes.
*** Makes about 15 half pints/500 mL jars

Thursday, 16 August 2012

Lemon Lavender Shortbread

If you have lavender in your garden and wonder what to do with the flowers when you cut them back.  This is a great way to use up some of them.  
These cookies are to die for!  Like most shortbread all you have to do is let this cookie melt in your mouth and enjoy the flavour medley.  I will often close my eyes and savour the taste.  The lavender adds a wonderful flavour.  I have made this recipe several times and I have family and friends who ask when I am going to make some more.  

Lemon Lavender Shortbread


  • 1/4 lb butter, at room temperature
  • 1/3 cup sugar
  • 1/2 tsp salt
  • 1 tsp lavender
  • 1 tsp fresh lemon zest
  • 1 cup all-purpose flour
  • 1. Beat butter, sugar, salt, lavender and lemon zest until light and fluffy.
    2. Add flour and beat until a soft dough results. Cover and refrigerate for 20 minutes.
    3. Roll dough into a 4" (10 cm) diameter log and wrap in a sheet of parchment paper. Chill for 1 hour.
    4. Preheat oven to 325° F (160° C). Slice log into 1/4" thick slices and place on cookie sheet. Bake for 20–25 minutes, until lightly golden at edges.

Tuesday, 14 August 2012

Strawberry Balsamic Black Pepper Jam


I love strawberry jam and when I came across this recipe last year I was very excited to try it.  I have use balsamic vinegar and black pepper to enhance the flavour on store bought strawberries before so I could only imagine what it would do for jam!  Last year I had a small strawberry harvest so I only made one batch.  Once it matured the jam went really fast.  I am happy that this year I have plenty of strawberries so I am making my second batch of the year tomorrow.
This jam goes great with fine cheeses, meats or on a nice pice of artisan bread.  I hope you enjoy it as much as I do.

Strawberry Balsamic Black Pepper Jam

4 heaping cups strawberries, washed, hulled and halved
1 1/2 cups sugar
3 tbsp lemon juice
1/4 cup balsamic vinegar
 1/4-1 tsp black pepper corns, cracked

  1. Place the strawberries, sugar and lemon juice in a non-reactive bowl.  Cover the bowl and allow the strawberries to macerate for about 24 horus.
  2. Sterilize the jars and warm the lids.
  3. In a wide, heavy bottomed pot bring the berry mixture to a full rolling boil that can not be stirred down.
  4. Remove the strawberries with a slotted spoon and continue to boil until the liquid begins to thicken.  
  5. Return the strawberries to the pot, and bring it back up to a boil.  Continue to boil, stirring frequently and skimming off any foam, until it reaches the setting point.
  6. Add the vinegar and pepper to taste; a full teaspoon will make quite a hot flavour - even 1/4 tsp will give a good hint of pepper.
  7. let the jam rest on low heat briefly and test to be certain it has reached the setting point, but be careful not to burn the jam.
  8. Ladle into the sterilized jars, leaving 1/4 inch of head space, seal with warm lids and process for 10 minutes at a rolling boil.
  9. Remove the lid and turn off the heat.  Allow the jars to sit in the hot water for another 5 minutes to cool down.
*** Let this jam age for at least a month before trying it to allow the flavours to really mature. 

Sweet and Spicy Brine

I have brined turkeys before but this was the first time I had tried brining chicken.  It is a simple way to add extra flavour to meat in a relatively short amount of time.  I like that when you go to grill the meat that it doesn't go and leave a sticky mess to scrub off afterwards.

Sweet and Spicy Brined Chicken

4 boneless skinless chicken breasts (pork will work as well)
1/4 cup coarse salt
1/4 cup dark brown sugar
12 whole black pepper corns
1 chili pepper thinly sliced (leave the seeds in if you want a spicier brine)
2 whole bay leaves
1 cup hot water
3 cups cold water
1 lemon, thinly sliced
1 onion, thinly sliced
2 cloves garlic, crushed
  1. Place the salt, brown sugar, pepper corns, chill and bay leaves in a bowl and add the hot water.  Whisk together until the salt and sugar have dissolved; add the cold water and allow to sit to reach room temperature.
  2. Rinse the chicken under cold water and pat dry. In a non-reactive baking dish arrange the meat so it lays flat.
  3. Arrange the garlic, onion and lemon slices over the meat.
  4. Pour the brine over the meat. Cover the dish with plastic wrap and keep it in the refrigerator for 2 hours, turning the meat once or twice.
  5. Preheat the barbecue and when you are ready to cook brush the grill with some oil.
  6. Cook the chicken on the grill, about 5-7 minutes a side.