I love to entertain and try new recipes. This is a way for me to share some of the recipes I have tried and what I have thought of them. I hope you enjoy it and let me know if there are some recipes you would like me to try.

Thursday 26 December 2013

Roasted Mushrooms and Pearl Onions

I love it when you find a simple recipe that you can make in advanced for a big meal, especially when the dish is full of flavour and a hit with everyone (everyone who likes mushrooms that is).  This recipe is so easy to make and it doesn't need any extras added to it, but if you feel like you need to add more you could always add your favourite fresh herbs or some garlic.  
I did last minute shopping so I ended having to do a mixture of mushrooms because of what was available.  Since I had to get was available I halved or quartered the large ones. I made these on Christmas Eve and then stuck them in the oven on Christmas day to heat up. It turned out great.
Apparently you can get pearl onions in the freezer section at the grocer but I opted to use some fresh ones instead.  The frozen ones would make the prep work faster since you do not have to top, tail and peel them.

Roasted Mushrooms and Pearl Onions

1 1/2 pounds of small, cremini mushrooms
8 oz pearl onions
1 tbsp olive oil
Coarsely ground salt an pepper to taste.
  1. Preheat the oven to 425.
  2. In a bowl, toss the onions and mushrooms with salt and pepper.
  3. Spread them in a single layer on a baking sheet.  
  4. Roast for 30 minutes or until tender and brown, stirring half way through.  

Chocolate Chip Candy Cane Cookies

Every year I like to try at least one new recipe when I do my Christmas baking.  This year I decided to look for one to help use up left over candy canes because ever year we seem to have some left over ones that do not get eaten off the Christmas tree.  I love the combination of peppermint and chocolate so when I came across a recipe that used them both I knew it was one that I would have to try.
These cookies turned out to be very tasty and like a shortbread cookie.  The time consuming part about this recipe, or anyone using chopped up candy canes in my opinion is the unwrapping the candy canes and chopping them up.  The best way I have found is to chop them in my food processor but then you do get a fair bit of candy cane powder.  Please let me know if you have found a way that works well!

Chocolate Chip Candy Cane Cookies

1 cup butter, softened
1/2 cup white sugar
2 eggs
2 tsp vanilla
1 tsp peppermint extract
2 3/4 cups flour
1 tsp cream of tartar
1 tsp baking soda
2 cups chocolate chips
1 cup crushed candy canes
  1. Preheat the oven to 400.
  2. Cream together the butter and sugar until smooth.
  3. Beat in the eggs, one at a time and then add the vanilla and peppermint.
  4. In a separate bowl combine the flour, tartar, soda and salt.  Then mix this into the creamed mixture.
  5. Stir in the candy cane chunks and chocolate chips.
  6. Spoon onto a cookie sheet and bake for 8 - 10 minutes.

Wednesday 4 December 2013

Roasted Garlic and Acorn Squash Strudel

I have been looking for the perfect opportunity to try this recipe for a while now and it finally came.  My inlaws were coming for dinner and they are always up for trying something new. They also don't mind keeping the little one entertained while I work in the kitchen.  Plus they were the ones who grew the squash I used.
This recipe will be a fall staple for me in the future I am sure, especially in years where I have a lot of squash to use up.  I will likely double the recipe and freeze half of the filling for later because it will not add much extra time.  The time consuming part of this recipe is preparing the phyllo for the filling to go into.  Depending on how patient you are and how flakey you like your strudels will be the main determinate in how long the last step takes you.
It is a very versatile strudel that could be use for many different purposes depending on the portion size.  This recipe could easily be adapted to use different types of squash or different spices.

Roasted Garlic and Acorn Squash Strudel

1 head roasted garlic
2 small acorn squash
olive oil
salt and pepper
1/4 cup fresh chopped sage leaves
1/4 tsp grated nutmeg
1 cup ricotta
1/3 cup toasted pine nuts
1/2 box phyllo dough, thawed
1 tbsp butter
3 tbsp olive oil
  1. Preheat the oven to 350.  
  2. Cut and gut the squash. Place in a baking dish cut side up and sprinkle with olive oil, salt and pepper. Have a quarter inch of water in the dish to help prevent the squash from drying out.  Bake for about an hour or until the squash flesh is cooked through (You can roast the garlic at the same time as you bake the squash).
  3. Scrape the insides of the acorn squash out with a fork and mash it well with a fork.
  4. Squeeze the garlic cloves out of the paper into a bowl and mash it with a fork.  
  5. Place in a frying pan over medium heat and add the sage leaves.  Fry until fragrant and then add the squash.  Once this mixture is cooked through set it aside to cool slightly.
  6. In a bowl, combine the squash mixture, nutmeg ricotta and pine nuts.  Stir well and add additional seasoning if desired.
  7. Preheat the oven to 400. 
  8. Melt the butter and olive oil together.  On a clean working surface lay out your first sheet of phyllo and brush the butter mixture over it.  Alternate the phyllo and butter mixture until you have about 10 layers.  
  9. Spread roughly a third of the squash mixture into the centre of the phyllo.  Make sure to leave about an inch on the edges.  Then roll up from the long side and tuck the ends in.  Transfer onto the baking sheet and repeat with the other two.
  10. Bake for 20 minutes or until they are golden and crispy.  

Tuesday 3 December 2013

Phyllo Bites

This past weekend my husband and I had our annual wine and cheese potluck and I thought I would try a couple new recipes.  I love those little phyllo bites that you can get and I figured they couldn't be too hard to make.    I decided to find a recipe and make them.
As I was making them, I remembered when I was planning my wedding and meeting with the caterer not understanding why the canapĂ©s were so pricey.  The caterer said it is the labour involved in making them that makes them expensive.  After making these phyllo bites I understand, they are pretty labour intensive but they taste great.  I will make them again but not for times when I have a lot of guest to feed.
When assembling these it is not an exact science so don't get too picky about making sure there are exact measurements in each bite.  Just try to have even amounts of the cheese and the preserve of your choice.  Remember not to make these too last minute.  It took me about 20 minutes to assemble 48 bites and then another 15 minutes for them to bake.
*Remember when working with phyllo to keep a damp cloth over the sheets you are not using to prevent them from drying out. 

Phyllo Bites

12 sheets phyllo pastry (thawed)
1/2 cup melted butter
2 cups cream cheese or brie
1 jar of your favourite preserve
  1. Preheat the oven to 375.
  2. Place one sheet of phyllo on your work surface and using a pastry brush lightly apply the butter.  Repeat with two more sheets.
  3. Cut lengthwise into three equal parts and then cross wise into quarters to make 12 squares.
  4. Spoon about a teaspoon of the cheese you are using and the preserve onto each square.
  5. Gather the corners and sides of each square together and gently twist the top together.
  6. Place on a cookie sheet and repeat with each bite.
  7. Bake for 15 minutes or until they are a nice golden colour.


Saturday 16 November 2013

Mark Bittam's Autumn Bake

On my desktop I have a folder for recipes I would like to try and when ever I come across one that I would like to try I save a copy of it in there.  Today I was looking for a particular recipe I plan on making tomorrow for dinner and I came across this one.  I opened it because I couldn't remember what exactly was in it and it turned out I had everything I needed for it on hand so it became tonight's supper.
I must admit, I have never heard of Mark Bittam before seeing this recipe but I really liked how it turned out so I am might look for more of his recipes in the future.
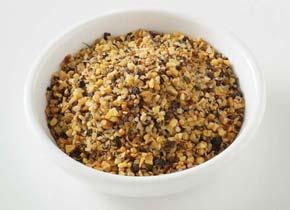
Don't worry if you don't have any millet because it would work well with other slow cooking grains such as barley.

Mark Bittam's Autumn Bake

2 tbsp extra virgin olive oil
3/4 cup millet
1 medium winter squash; peeled, seeded and cut into 1 inch cubes
1 cup cranberries
salt and pepper
1 tbsp minced sage leaves
2 tbsp maple syrup or honey
1 cup vegetable stock, warmed
1/4 cup pumpkin seeds or chopped walnuts
  1. Preheat the oven to 375 and oil a 2 quart casserole dish.
  2. Place a frying pan over medium-high heat and add olive oil.  When it is heated add the millet and stir it as the millet becomes fragrant and turns a golden brown.  Remove from the heat and place as a layer on the bottom of the casserole dish.
  3. In a bowl, toss together the squash, cranberries, sage, salt and pepper.  Once thoroughly mixed spread on top of the millet.
  4. Drizzle the maple syrup on top and then pour the warmed stock over top.  Cover with a lid or tightly with tinfoil and bake undisturbed for 45 minutes.
  5. Remove the cover and increase the oven temperature to 400.  Have a taste to see if you need to alter the seasoning or add extra water for the millet to finish cooking.  Bake for about another 10 minutes (or until the millet is cooked through).

Sunday 10 November 2013

Curried Pumpkin Soup

Growing up my aunt and uncle would have a big pumpkin carving party at their house and one of my favourite things about this party was enjoying my aunt's curried pumpkin soup.  It was always so flavourful and creamy.  I still had some pumpkins to use up so I thought I would make a batch now that  the colder weather has come to stay.  I was having some friends over and found a dairy free recipe so everyone could eat it.  The blend of spices in this recipe were wonderful, especially on the second day.
If you are new to cooking with pumpkins, the best ones to get are the proper sugar or baking pumpkins as they are tastier than the other varieties.

Curried Pumpkin Soup

2 onions, diced
2 tbsp olive oil
2 cloves garlic, minced
1 1/2 tsp fresh ginger, peeled and minced
2 tsp ground cumin
1 tsp ground coriander
1/8 tsp ground cardamin 
1 1/2 tsp salt
1/2 tsp dried hot red pepper flakes (more if desired)
4 cups pureed sugar pumpkin pulk
4 cups water
1 1/2 cups vegetable broth
1 can coconut milk
  1. Cook onions in olive oil over a medium-low temperature, stirring occasionally, until they are tender.  Add the garlic and ginger and stir for 1 minute.  Add the spices and continue stirring for another minute.
  2. Add the pepper flakes, pumpkins, water, broth and coconut milk.  Allow the soup to simmer over low heat for half an hour, stirring occasionally. 
  3. Use a blender to puree the soup in batches.

Wednesday 6 November 2013

Vegan Butterscotch Blonde

This recipe is based off another recipe I have posted before (Garbanzo Bean Chocolate Cake) but altered a little bit so it is something my sister can enjoy without having her allergens in it.  This experiment turned out very well, even my grandmother wanted the recipe so she could make it for her friends who were coming over to play bridge the following well.
I really like this recipe because there is not much mess to clean up and the food processor does most of the work for you.  Even though it is gluten free and vegan it tastes great. Most people won't believe you when you tell them what it is made up of.
I hope you enjoy it as much as my family does!
You can make this recipe without adding the white sugar and it still tastes great.

Vegan Butterscotch Blonde

1 1/2 cups butterscotch chips
1 can garbanzo beans, rinsed and drained
2 bananas
3/4 cups white sugar
1/2 tsp baking powder

  1. Preheat the oven to 350 degrees F (175 degrees C). Grease a 9-inch round cake pan.
  2. Place the butterscotch chips into a microwave-safe bowl. Cook in the microwave for about 2 minutes, stirring every 20 seconds after the first minute, until the butterscotch is melted and smooth. If you have a powerful microwave, reduce the power to 50 percent.
  3. Combine the beans and bananas in the bowl of a food processor. Process until smooth. Add the sugar and the baking powder, and pulse to blend. Pour in the melted butterscotch and blend until smooth, scraping down the corners to make sure chocolate is completely mixed. Transfer the batter to the prepared cake pan.
  4. Bake for 40 minutes in the preheated oven, or until a knife inserted into the center of the cake comes out clean. Cool in the pan on a wire rack for 10 to 15 minutes before inverting onto a serving plate. Dust with confectioners' sugar just before serving.


Friday 25 October 2013

White Wine Pasta Sauce

This is one of those trying to use up ingredients in the fridge type of recipes.  I was looking through a cook book of mine and found a recipe for a mushroom stroganoff and it looked tasty so I decided to make it.  When I looked at the recipe closer it called for a white wine sauce but did not have one anywhere in the book.  I searched online and this is what I came up with.  The sauce on its own is very nice but it is also great when you add some mushrooms and onions to it.
If you would like a thicker sauce you can add some flour or cornstarch.

White Wine Pasta Sauce

4 cloves garlic, minced
1/4 cup olive oil
5 tbsp butter
1/2 cup white wine
1/2 tsp freshly ground black pepper
1/2 cup chopped flat leafed parsley
1/2 cup parmesan cheese
  1. Heat olive oil over medium high heat.
  2. Add garlic and sauté until golden.
  3. Add the butter, black pepper and white wine. stirring to combine.
  4. Remove from heat, adding the parsley and cheese before using on pasta.


Tuesday 15 October 2013

White Sauce

I like using this white sauce as a base for many things and it is very easy to add extra flavours into.  I wanted to make a casserole to use up extra turkey and I don't like using canned soups because of all the 'extras' found in the commercial varieties.  
The milk will blend more readily if it is pre warmed.

White Sauce

5 tbsp butter
4 tbsp four
1 tsp salt
1/4 tsp pepper
2 cups milk
  1. Melt the butter in an heavy saucepan over a low heat.
  2. Stir in the flour, salt and pepper until well blended.
  3. Remove from heat and add the milk.  Stirring it constantly to blend.
  4. Return to heat and cook, stirring until the sauce has thickened and is smooth.

Sunday 13 October 2013

Maple Baked Acorn Squash

I love squash! They are tasty, filling and easy to prepare.  They are the perfect side dish to a meal because you just need to scoop out the seeds, put it in some butter and seasoning and then through it in the oven to bake while you make the other parts of the meal.
This year we are in luck because the vines produced plenty so we have lots to enjoy.

Maple Baked Acorn Squash

1 acorn squash
1 tbsp butter
2 tbsp brown sugar
2 tbsp maple syrup
  1. Preheat the oven to 400.
  2. Cut the squash in half and scoop out the seeds.  Score the inside of the squash and place cut side up in a baking dish filled with 1/4 inch of water.
  3. Coat the inside with 1/2 tbsp of butter, sprinkle the brown sugar over the surface and drizzle the maple syrup over top.
  4. Bake for about an hour, until the flesh has softened and slightly browned.
  5. Spoon any excess sauce over the flesh before serving.

Wednesday 9 October 2013

Homemade Taco Seasoning

The amount of sodium, additives and preservatives in prepackaged food drives me crazy and I prefer to make my own seasoning if I can.  I came across this recipe online and I was very excited to try it.  It really is just a guideline on how to start but you can always play with the portions of each ingredient until you are happy with the taste.
It works great on meats and if you want to spice up your grated cheese in dishes.  We toss grated cheese in it to make a tex-mex cheese for nachos.


Homemade Taco Seasoning

1 tbsp chili powder
1/2 tsp garlic powder
1/4 tsp onion powder
1/4 tsp crushed red pepper flakes
1/4 tsp dried oregano
1/4 tsp paprika
1 1/2 tsp ground cumin
1 tsp salt
1 tsp black pepper

Use a mortar and pestle to blend the ingredients together.  If you have any extra, store in an air tight container.

Friday 4 October 2013

Microwave Mini Chocolate Cakes

I was so excited to find this recipe, I think it is genius! If you haven't noticed by my posts, I have a real sweet tooth and I love chocolate.  I love that I can quickly whip up this recipe when I need a sweet treat and not have a whole chocolate cake to eat.
It is very quick to prepare and makes enough for two people if you have someone to share it with but it is not too much if you have to eat it your self.
Don't be afraid to add little extras in such as white chocolate chips or Reese Pieces. ;)

Microwave Mini Chocolate Cakes

1/4 cup all purpose flour
6 tbsp sugar
3 tbsp cocoa powder
1/4 tsp salt
1 egg
3 tbsp milk
3 tbsp vegetable oil
1/2 tsp vanilla
  1. In a small bowl, whisk together the dry ingredients.
  2. Whisk in the egg.
  3. Whisk in the milk, oil and vanilla.
  4. Divide the batter between two microwave safe, small bowls.
  5. Microwave on high for 1 - 1 1/2 minutes or until the cake is puffy and starts to set on top.

Wednesday 25 September 2013

Zucchini Gratin

This dish is a great way to use up some zucchini.  If it is a larger zucchini I would recommend seeding it and cutting it into quarters before slicing it for the dish.
The gratin taste marvellous and it is even a dish zucchini skeptics can enjoy.  It is very simple to prepare and one that you can prep in advance and cook later.  The dish is filling enough to serve as a main but would also work as a side for a roast.
I am sure you would be alright to substitute swiss cheese for Gruyere.

Zucchini Gratin

6 tbsp butter
3 large onions, sliced
4 small zucchinis, sliced
1 tsp salt
1 tsp ground pepper
1/4 tsp nutmeg
2 tbsp flour
1 cup milk
3/4 cup bread crumbs
3/4 cup Gruyere cheese, grated
  1. Melt the butter in a large sautĂ© pan (large enough for the zucchini and onions to all go in, a wok will work if you don't have a big enough one) and cook the onions until they are soft and translucent.  You do not want them to brown.
  2. Add the zucchini and cook it covered for 10 minutes.
  3. Add the salt, pepper and nutmeg.  Uncover and cook for another 5 minutes.
  4. Whisk the flour into the hot milk and pour over the mixture.  Cook over low heat until the remaining liquid is more like a sauce.
  5. Pour the mixture into a 8 x 10 inch baking dish.
  6. Combine the bread crumbs and Gruyere and sprinkle it on top of the zucchini mixture.
  7. Cut the 1 tbsp of butter into small pieces and dot it on top of the crumble top.
  8. Bake at 400 for 20 minutes or until the it is bubbly and browned.

Saturday 21 September 2013

Buttermilk Waffles


Homemade waffles are a weekend guilty pleasure around my house.  Store bought frozen waffles have their place for something quick on a weekday morning but homemade are far superior.  I have been known to make extra waffles on the weekend to freeze to use during the week.
I love having a relaxing morning where I can make some waffles and not be in a rush to get out of the house.  I hope you get a chance soon to enjoy a slow peaceful morning enjoying these wonderful treats.

Buttermilk Waffles

1 1/2 cups all purpose flour
2 tbsp sugar
1 tsp baking powder
1/2 tsp baking soda
1/4 tsp salt
2 eggs
2 cups buttermilk or sour milk
1/2 cup cooking oil or melted butter
1 tsp vanilla
  1. In a medium bow stur together flour, sugar, baking powder, baking soda and salt.  Make a well in the centre of the flour mixture and set aside.
  2. In a separate bowl, beat the eggs slightly; stir in the milk, oil and vanilla.  
  3. Add the egg mixture all at once to the flour mixture.  Stir until just moist (it should still be slightly lumpy).
  4. Pour enough batter onto your waffle iron and cook according to the manufacturer's directions.

Friday 20 September 2013

Grant Loaves

I have a pretty good collection of cook books and I enjoy going through each of them.  There are some that I have had for years with a bunch of post-it flags on pages with recipes I would like to try.  The other day, when one of my sisters was over she pulled out one I had not looked at in a very long time.  Once she left I decided to thumb through the recipes I had flag to see if they still peaked my interest.  I came across this recipe and thought it would go very nice with a butternut squash soup I was planning on having for dinner.

This recipe dates was created by the baker Doris Grant during the second world war and first published in the 1940's.  It is a great bread recipe because it doesn't require any kneading and can be put together rather quickly.

Grant Loaves

12 cups whole-wheat bread flour
1 tbsp salt
1 tbsp rapid-rise dried yeast
1 tbsp molasses sugar
  1. Grease three loaf pans and set aside.
  2. Sift together the flour and salt in a large bowl.
  3. Sprinkle the dried yeast over 1 2/3 cups luke warm water.  After a couple of minutes, stir in the sugar and let it sit for 10 minutes.
  4. Make a well in the center of the flour.  Pour in the yeast mixture and add an additional 3 3/4 cups of water.  Stir to form a slippery dough.  Mix for about 1 minute, working the dry ingredients form the sides into the middle.
  5. Divide the dough among the prepared pans.  Cover with oiled plastic wrap and let them rise in a warm place for about 30 minutes.
  6. Preheat the oven to 400.  Bake for 40 minutes, or until the loaves are crisp and sound hollow when tapped on the base.  Allow to cool on a wire rack.

Saturday 14 September 2013

Cream Cheese Chocolate Chip Cookies

Today I caved into a sweet craving and ended up making some chocolate chip cookies.  Chocolate chip cookies have always been a comfort food for me.  My mom has mastered making chocolate cookies but she made them so much when we were growing up she doesn't like making them any more.  Growing up they were a staple at my house and I remember coming home from school and heating a couple up in the microwave so I could have warm chocolate chip cookies to go with a nice cold glass of milk.
When I was away at university there was a restaurant called the Cheesecake Cafe and they made these really yummy cheesecake chocolate chip cookies.  Since I had some cream cheese in my fridge I thought I would try to make some cheesecake chocolate chip cookies.  I found a cream cheese chocolate chip cookie recipe and I thought it would be a good place to start.
The recipe was very easy and I was able to make them with very little effort.  This recipe does really well in a stand mixer.  The cookies turned out soft and moist.  I am hoping that I can use all my will power to make them last for at least a little while.

Cream Cheese Chocolate Chip Cookies

1/2 cup cream cheese
1/2 cup butter
1/2 cup brown sugar
1/4 white sugar
1 egg
1 1/2 tsp vanilla
1 1/4 cups flour
1/2 tsp baking powder
1/4 tsp salt
1 cup chocolate chips (there is no harm in adding extra)
  1. Preheat the oven to 350.
  2. Cream together the cream cheese, butter and the sugars.
  3. Beat in the egg and vanilla.
  4. Mix in the flour, baking powder, and salt.
  5. Add the chocolate chips.
  6. Drop them onto a cookie sheet.  The drops should be about the size of a large gum ball. 
  7. Bake between 10 -14 minutes or until they are lightly browned around the edges.

Tuesday 10 September 2013

Coconut Sorbetto

For as long as I can remember I have always loved the taste of coconut and I am always looking for ways to incorporate it into my meals.  This is a easy sorbetto to make and it has a wonderful taste.  Since it uses coconut milk instead of dairy milk it is one of the few sorbettos that is dairy free.  It is a nice way to finish off a good meal and pairs well with a mango sorbetto.

Coconut Sorbetto

14 oz can unsweetened coconut milk (not light)
1 1/4 cups water
1 cup sugar
1/4 cup sweetened shredded dried coconut
  1. In a medium saucepan over medium heat, combine the coconut milk, water and the sugar.  Whisk the mixture to dissolve the sugar.
  2. Reduce the heat to medium-low and simmer for 4 minutes.
  3. Pour into a bowl and allow enough time for it to completely cool before placing it in the refrigerator for at least 4 hours.
  4. Stir the shredded coconut into the mixture.
  5. Pour into the container of an ice cream maker and churn according to manufacturer's instructions.

Friday 6 September 2013

Bocconcini and Tomato Salad

Every summer we grow tomatoes in our backyard.  I love the flavour home grown tomatoes have and I love the smell of the tomato plants on my hands when I pick them.  Throughout the summer this salad is a staple in our house because it is so easy to make and it is a great way to use up the fresh tomatoes.

Bocconcini and Tomato Salad

4-5 tomatoes
3 bocconcini cheese balls
fresh basil, chopped
oregano
olive oil
balsamic vinegar
  1. Slice the tomatoes and the cheese. Arranging alternating between cheese and tomato on a serving plate.
  2. Top the tomato and cheese arrangement with basil and oregano.
  3. Drizzle olive oil and balsamic vinegar over the salad.

Wednesday 4 September 2013

Apple Sage Sauce

In the past I have gotten a Sage and Apple Stuffing mix and one evening when having some ravioli I decided to use it with some butter on the pasta.  Normally I like to use a pesto on ravioli but the stuff I was planning to use turned out to be mouldy.  The stuffing mix really complemented the flavours of the ravioli.
This year our sage plants have done very well and so I decided I would try to make my own sauce to use with pasta.  This was a simple sauce that did not take very long to make and would complement many dishes.

Apple Sage Sauce

2 apples, cored and chopped
1 onion, finely chopped
1tbsp fresh sage, finely chopped
butter, as needed
sugar, as needed
  1. Fry the apple and onion in butter until the onion is translucent.
  2. Add a little water, enough so half of the apple is covered. Simmer to soften the apple for about 15 minutes.
  3. Add the sage and mix well.
  4. Continue to heat as necessary to remove excess water.  Serve immediately.

Thursday 29 August 2013

Blackberry Cabernet Sorbetto

At our house, when we make a dish that has a hidden or unexpected ingredient in it we will often try to get our guest to try to guess what it is.  This one cam be an easy guess or a hard one depending on if the individual enjoys wines.
This sorbetto is perfect to enjoy on a nice hot day on the patio or poolside with some friends.

Blackberry Cabernet Sorbetto

2 cups cabernet sauvignon
6 cups fresh black berries
1 tbsp fresh lemon juice
1 cup water
1 cup sugar
  1. In a medium saucepan, combine the water and sugar.  Bring to a boil over medium-high heat, whisking often to help the sugar dissolve.  (Start step 2)  Reduce the heat to medium-low and simmer for 4 minutes.  Continue whisking until the sugar has dissolved.  Remove from the heat and let cool, then transfer to a bowl, cover the bowl and chill in the refrigerator for at least 1 hour.
  2.  Pour the wine into a second saucepan and place over medium heat.  Simmer the wine until it reduces by half.  Remove from the heat and let it cool before transferring it into a covered bowl and refrigerating it for at least an hour.
  3. In a blender, puree the blackberries and lemon juice until smooth.  Pour the puree through a fine-mesh strainer, pressing the solids to extract all of the puree.  Discard the seeds.
  4. Whisk together the puree, wine reduction and simple syrup.  Pour the mixture into the container of an ice cream machine and churn according to the instructions.
  5. Transfer the serbetto to an airtight container and freeze for at least two hours before serving.

Friday 23 August 2013

Zucchalmond Squares

Another day, another zucchini to use up.  That seems to be what is like these days but I am up for the challenge.  I have a whole folder on my computer dedicated to zucchini recipes I would like to try and there are a bunch in my different cook books that I would like to try.  Right now I seem to have a few of the large zucchinis to use up and whoever has grown zucchinis knows that this is a common occurrence if you are not sure to pick every small one or if you forget to pick for a couple of days in a row.
When trying a recipe for the first time I like to stay true to the listed ingredients and suggestions.  After I try the result I will sometimes make notes on the recipe for any changes I might make for the next time I use the recipe.  This square turned out very nicely but I think next time I would add some slivered or blanched almonds to it so there is a bit of a crunch.

Zucchalmond Squares

1 1/2 cups peeled and finely chopped zucchini
1 tsp almond extract
2 egg whites
1/3 cup sugar
1/2 cup flour
1 tsp baking powder
1/4 tsp salt
  1. Sprinkle chopped zucchini with almond extract and set aside.
  2. Beat the egg whites with and electric mixer until they are foamy.
  3. Add the sugar and continue to beat thoroughly with the electric mixer.
  4. Mix together the dry ingredients and add to the egg and sugar mixture.
  5. Fold in the zucchini.
  6. Spoon into a greased 8x8 pan. Bake at 350 for 40 minutes.
  7. Cool in the pan and then cut into squares.

Zucchini Chips

So I heard a zucchini joke from my cousin the other day and I thought I would share it:
What do you know about someone you see buying a zucchini in a store? They don't have any family or  friends.
Funny thing is a couple of weeks ago I was talking to a friend and she said she had just bought a bunch of zucchini at the store.  I laughed at her and asked why on earth she would do that when I have told her all she needs to do is ask.
Anyways more to the point of this post.  These chips are an easy way to use up zucchinis quickly.  I find the best ones to use are the small ones.  They are a great healthy snack that you can eat on the go or enjoy with dips.

Zucchini Chips

small zucchinis
seasoning of you choice

  1. Use a mandolin to slice the zucchini thinly.  As you slice sprinkle with the seasoning.
  2. Arrange on the trays of a dehydrator.
  3. Dehydrate over night and enjoy!

Blackberry and Apple Soufflé

Blackberry season is upon us and right now my husband has been doing a great job of picking them for us to enjoy.  We have also been freezing them for year long enjoyment.
My husband has talent in the kitchen and enjoys making ice creams and creme brûlée so we often have egg whites to use up in the fridge.
This soufflĂ© is an excellent way to enjoy the blackberries and use up some of those egg whites.   I have also used this recipe with other berries.  This recipe will make 6 individual sized ones or one larger one.

Blackberry Apple SoufflĂ© 

3 cups blackberries
1 large cooking apple, peeled and diced finely
3 egg whites
3/4 cups superfine sugar 
  1. Preheat the oven to 400 and put a cookie sheet in the oven to heat.
  2. Grease and sugar 6 individual (2/3 cup) soufflĂ© cups. 
  3. Cook the blackberries and apple on the pan for 10 minutes, or until the juice runs from the blackberries and the apple has pulped down well.
  4. Press through a strainer into a bowl.  
  5. Stir in 1/4 cup  of the sugar and set aside to cool.
  6. Put a spoonful of the puree into each of the soufflĂ© cups. 
  7. Whisk the egg whites in a large bowl until they form stiff peaks.  Then gradually whisk in the remaining sugar.
  8. Fold in the remaining fruit puree and spoon the flavoured meringue into the prepared dishes. 
  9. Level the tops with a metal spatula and run a knife around the edge of each dish.
  10. Place the dishes on the hot cookie sheet and bake fore 10-15 minutes, until the soufflĂ© have risen well and are lightly browned.  (Check with the oven light, do not open the oven door because they will fall).
  11. Dust the top with a little sugar and serve immediately.

Wednesday 21 August 2013

Chocolate Zucchini Spice Cake

I must admit, I was always sceptical of chocolate zucchini cake growing up and was hesitant to try it.  Maybe it was because my family didn't grow vegetables growing up so I never tried zucchini as part of anything.  When a friend of mine told me she was going to use chocolate zucchini cake for here wedding cake I was shocked and thought she was a little crazy.  Then came her wedding day and I was pleasantly surprised when I tried the cake.  Since then I have tried to open my mind to experimenting more and I am glad I did.
For the past few years I have been using the same recipe for chocolate zucchini cake but the other day I decided to try a new one with a bit of spice to it.  I really enjoyed the end product and those who helped me eat it did as well.  This is another recipe that works well for using up a large zucchini.

Chocolate Zucchini Spice Cake

1/2 cup butter
1/2 cup vegetable oil
1 3/4 cups sugar
2 eggs
1 tsp vanilla
1/2 cup sour milk
2 1/2 cups flour
4 tbsp cocoa
1/2 tsp baking powder
1 tsp baking soda
1/2 tsp cinnamon
1/2 tsp cloves
2 cups finely diced zucchini
1/4 cup chocolate chips
  1. Cream together the butter, oil and sugar.
  2. Add the eggs, vanilla and sour milk.  Beat together with an electric mixer.
  3. Mix together all of the dry ingredients and then add it into the cream mixture.  Use the mixer to combine.
  4. Stir in the zucchini.
  5. Pour into a 9x12 pan and sprinkle the top with the chocolate chips.
  6. Bake at 325 for 40-45 minutes or until a toothpick comes out clean.

Blonde Zucchini Brownies

A couple years ago at a country fair I picked up a zucchini cookbook for fifty cents and it was worth every penny!  As you can tell by the duck tape, it has been well loved.  I highly recommend it to anyone who grows zucchinis.

This year is a particularly abundant year for zucchinis for my family so I have tried several recipes from it and I am a little behind in my posts.  There will be a bunch of zucchini posts for the next little while.  I have also found it is very easy to double or triple the recipes so I can have stuff to pull out of the deep freeze when short on time.
I have to admit this was my first time making blonde brownie, my mom has a amazing fudge-brownie recipe I use as my regular.  That being said this brownie tasted great and I think it will become one of my regular trying to use up the baseball bat zucchini recipes.

Blonde Zucchini Brownies

1/3 cup butter
1 tbsp hot water
1 cup brown sugar, firmly packed
1 egg
1 tsp vanilla
1 cup flour
1 tsp baking powder
1/8 tsp baking soda
1/2 tsp salt
3/4 cup peeled and diced zucchini
1/2 nuts (optional)
1/4 cup butterscotch chips
  1. In a large pan melt the butter with the hot water.  Add the brown sugar and beat well.
  2. Take off the heat and allow to cool for a bit.  Beat in the vanilla and egg.
  3. Mix together the dry ingredients and add to the sugar mixture.
  4. Stir in the zucchini (and the nuts if you are using them).
  5. Pour the mixture into a greased and floured 9x9 pan.
  6. Sprinkle with butterscotch chips and bake at 350 for 20 - 25 minutes.

Tuesday 20 August 2013

Chocolate-Peanut Butter Ice Cream

I know I am not alone when I say that chocolate and peanut butter go so well together.  There are many ways this partnership can be enjoyed.  Growing up I remember my dad making himself peanut butter and chocolate chip sandwiches as a treat.  Reese's Pieces and Reese Peanut Buttercups are always great.
I was very happy to come across this chocolate and peanut butter ice cream recipe in one of our cook books and the resulting guilty pleasure is a wonderful treat. I am also very lucky because my husband enjoys trying different creations in our ice cream maker.  It is always nice to be able to have a couple of different ice creams in the freezer so you can enjoy different flavours depending on your mood. The only thing I need to work on now is my self control!

Chocolate Peanut Butter Ice Cream

2 cups half and half cream
1/4 cup unsweetened cocoa powder
1/2 cup sugar
pinch of salt
1/2 cupi smooth peanut butter
  1. Whisk together the cream, cocoa powder, sugar and salt in a large sauce pan.
  2. Whisk the mixture as you heat it to a full, rolling boil. (It will start to foam up)
  3. Remove from the heat and whisk in the peanut butter until it is thoroughly blended.
  4. Chill the mixture.
  5. Churn it in you ice cream maker according to the manufaturer's instructions.

Wednesday 14 August 2013

Green Beans Amandine

It is always nice to put a bit of a twist on your vegetables so you are not eating the same thing over and over again.  I try to keep an eye out for recipes that will not add a lot of prep time but will add to the flavour.  Last night I was looking for a different way to enjoy some green beans and after a little bit of searching I came across this recipe.  I really enjoy nutmeg so I thought it was worth a try.
The extra flavour was amazing and the beans were so tasty!  They would complement many dishes, such as a roast or chicken very nicely.
This dish is one you could prep mostly a couple of hours in advance for a dinner party and just do the last step before you are about to serve the meal.  I think it is one that would impress your guests.
On a side note, when topping and tailing green beans I find it easiest to snap off the extra bits instead of using a knife.

Green Beans Amandine

1 lb green beans, topped and tailed
1/3 cup slivered almonds
1tbsp butter
1/4 tsp ground nutmeg
  1. In a deepish frying pan boil about an inch of water.  Place the beans in and cover with a lid, cooking the beans until they are tender crisp.  Remove them from the pan and place in cold water to prevent further cooking.
  2. Discard the water and return the pan to the stove on a medium heat.  Add the almonds and toast until they lightly brown and become aromatic.  Remove from the pan to use for later.
  3. Return the pan to a medium heat and add the butter, almonds and the nutmeg.  Toss them in the pan until the beans have reheated.  Toss in the almonds just before serving.

Monday 12 August 2013

Mustard Glaze

It is always nice to liven up your meal with a glaze when cooking plainer food.  I found this glaze to be very versatile and easy to prep for in advance.  I am sure it would taste great with just about any type of mustard you can get your hands on, however I am not sure that I would bother if you have a rather plain hotdog variety.

Mustard Glaze

1 tbsp mustard of your choice
1/4 cup white balsamic vinegar
2 tbsp olive oil
2 tsp sugar
  1. Whisk together the ingredients and pour over your choice of vegetables or meats.

Friday 2 August 2013

Curried Zucchini Soup

Zucchini season is here and they are growing like crazy.  Now it is time to try all those recipes I have saved on my desktop or found in a cookbook so over the year.  I think we get enough zucchinis during the season that I don't go out of my way to buy them when they are not in season.  Plus if I don't have enough time to make use of them before I get the next batch off the vine then I will freeze them for soups, sauces and muffins to use throughout the year.
I came across this recipe for a soup that could be serve hot or cold and figured it would be worth a try.  I don't think I would have thought to use curry powder with zucchini on my own.  I really enjoyed the flavour of this soup.  It is a nice and straight forward recipe that does not require too much prep time which is a bonus in my books.

Curried Zucchini Soup

1 tbsp olive oil
1 large onion, chopped
2 cloves garlic, minced
2 tsp curry powder
1 large or 2 medium zucchinis, sliced

  1. In a large saucepan, over medium heat, add the oil and onion.  Stir occasionally, until the onion is soft (about 4-5 minutes).  Add the garlic and curry powder, stirring constantly until it is fragrant.
  2. Add the zucchini and add enough water to cover the zucchini.  Bring to a boil and then reduce the heat, simmering the zucchini until it is tender.
  3. Using a blender or an immersion blender, puree the soup and then serve at your desired temperature.

Tuesday 30 July 2013

Zucchini Bake

It is that time of year again, zucchinis are in season and if you have ever grown them you know how prolific they can be.  With the baby it can be a little tricky to know how long she will sleep so I am not sure if I am going to get a chance to do much preserving this year so I have been on the lookout for new ways to use up zucchinis.  I was doing some house sitting and came across a zucchini and cheese bake recipe but for the life of me I could not find a cheese grater anywhere in the house so I decided to try it with out the cheese.  It turned out quite well and I am pretty sure it will become a summer staple for us.  It is really easy to prepare, especially if you use a food processor or mandolin to slice up the vegetables.

Zucchini Bake

2 large zucchini, thinly sliced
2 cups mushrooms, thinly sliced
1 red onion, thinly sliced
1/2 tsp dried oregano
1 tbsp olive oil
  1. In a large baking or casserole dish alternate layering the zucchini, mushrooms and red onion.  
  2. Sprinkle the top with the oregano and olive oil.
  3. Preheat the oven to 400. Cover the dish with tinfoil and bake for 30 minutes.  Remove the tinfoil and bake for another 10 minutes. 

Tuesday 23 July 2013

Fava Bean and Asparagus Salad

The summer is a great time to enjoy a nice salad with fresh vegetables from the garden that are not available during the rest of the year.  Fava beans are easy to grow and do so much for the soil so we often grow them.  My in-laws came over with a surplus of vegetables form their garden the other day and they were kind enough to shared some of their bounty.  Fava beans were among the pickings from the day.  I decided to search for ideas to make a fava bean salad.  After looking at a few different recipes I decided to create my own after taking ideas from a few different places.  It tasted wonderful on it's own but the addition of some bacon or cheese would be fine if you wanted a little more.

Fava Bean and Asparagus Salad

2 cups peas (fresh or frozen)
2 cups fava beans
2 bunches asparagus
6 sun-dried tomatoes, sliced
1 can artichoke hearts
1 shallot, thinly sliced
1/2 cup vegetable oil
3 tbsp olive oil
2 tbsp balsamic vinegar
  1. Cook the lava beans in boiling water until just tender, about 4 minutes.  Remove them with a slotted spoon and place into cold water to prevent further cooking.  After they have cooled, remove the outer skins and place into your salad bowl.
  2. If you are using frozen peas add them to the bowl as is but if you are using fresh peas cook them in the boiling water until they are just tender, about 3 minutes.  Once they are tender remove them with a slotted spoon and place them in cold water to prevent further cooking. Then once they have cooled add them to the salad bowl.
  3. Add the asparagus to the boiling water and cook until just tender, about 4 minutes.  Remove them with tongs and place them in cold water to stop them from continuing to cook.  Once they have cooled you may decide to cut the spears into bite size pieces or add them directly into the salad bowl.
  4. Combine the vegetable oil and shallots into a pot over medium heat and cook until the shallots are a golden brown.  Remove the shallots and place them on paper towel to absorb any excess oil.
  5. Drain and rinse the artichoke hearts and slice them in to smaller pieces.  Add them to the salad bowl.
  6. Add the sliced sun-dried tomatoes to the bowl and add the olive oil and balsamic vinegar.  Then toss the ingredients together.
  7. Add the shallots as a garnish and serve.


Wednesday 10 July 2013

Red Current Compote

I love currents and at the farm we have about 15 red current bushes.  This year we have collected quite the harvest.  This year we decided to pick the sprays off the bushed and because of the heat we would remove the individual currents in the cool of our home.  We had 12 litres of sprays to process so we enlisted the help of my in-laws to help us with the task.  They were awesome and we had a lovely couple of hours talking while working.  Before we started I thought it would be nice to bribe them with some baked brie cheese and a red current compote.  It was such a hit some individuals (not mentioning any names) mopped up their plates and the serving bowl in order to make sure there was not any wasted.
This recipe is simple and very enjoyable.  Depending on how many people you are planning to feed with it, you may want to double the recipe.  It goes well with meats as well as cheese and can be used as a spread for bread.

Red Current Compote

1 1/2 cups red currents
6 tbsp red wine
4 tbsp sugar
2 tbsp butter
2 tsp corn starch
  1. Combine the ingredients into a sauce pan over medium heat. Stir it while it comes to a boil.
  2. Reduce the heat and continue stirring until it reaches the desired consistancy. 

Wednesday 3 July 2013

Summer Tomato Salad

There are so many wonderful things about summer and one of the things I enjoy is the ability to eat fresh locally grown produce.  My husband and I keep a vegetable garden but this year with the baby we haven't really planted anything except for tomatoes and some herbs.  Our tomatoes are not ready yet but this salad is one that taste amazing, especially when you can use tomatoes fresh off the vine.  It is even better if you can pick the herbs from the garden as well.

Summer Tomato Salad

2 - 3 fresh, sliced tomatoes
~ 1/2 cup green onions
~ 1/2 cup parsley
~1/4 cup fresh basil
1/4 - 1/2 cup feta cheese
1/3 cup olive oil
3 tbsp balsamic vinegar
1 tsp dijon mustard
  1. Slice the tomatoes and lay out the slices on a large platter or an attractive plate.
  2. Sprinkle each slice with chopped green onion, fresh basil and parsley.
  3. Top with crumbled feta cheese.
  4. Blend together the olive oil, vinegar and dijon.  Sprinkle it onto the salad just before serving.

Monday 17 June 2013

Lemon Sorbetto

I love lemons! I find them so refreshing.  The only thing I would rather have than a glass of lemonade on a hot summers day is the lemon sorbetto.  It really hits the spot.  I have tried making this a couple of time with different varieties of lemons but I think my favourite type to use is the regular variety you get at the grocery store.

Lemon Sorbetto

1 cup fresh lemon juice, strained and chilled
2 cups water
2 cups sugar
1 tbsp finely chopped grated lemon zest
  1. In a medium saucepan, combine the water and sugar.  Bring to a boil over medium-high heat, whisking often to help the sugar dissolve.  Reduce the heat to medium-low and simmer for 4 minutes.  Continue whisking until the sugar has dissolved.  Remove from the heat and let cool, then transfer to a bowl, cover the bowl and chill in the refrigerator for at least 1 hour.
  2. Combine the simple syrup, lemon juice and rind in the container of the ice cream maker and churn according to the manufacturer's instructions.

Monday 3 June 2013

Mango Sorbetto

I am so excited for the warm weather to be back, not only because I love spending time outside in the sunshine but because my husband makes wonderful frozen treats.  A couple of years ago I got him an ice cream maker for Christmas and I think it is one of the best things I could have got him because I love the results.  Our freezer is always stocked with some of his various creations.  This mango sorbetto has to be one of my favourites, I prefer it to mango ice cream because nothing else competes for the mango flavour.
I was so happy when I went to the grocer and found a great deal on some mangos I couldn't resist the urge to by some for some fresh mango sorbetto.  This recipe really lets the naturally amazing flavour of the mango shine!

Mango Sorbetto

1 cup water
1 cup sugar
4 large mangos, peeled and cut into chunks (about 4 cups)
  1. In a medium saucepan, combine the water and sugar.  Bring to a boil over medium-high heat, whisking often to help the sugar dissolve.  Reduce the heat to medium-low and simmer for 4 minutes.  Continue whisking until the sugar has dissolved.  Remove from the heat and let cool, then transfer to a bowl, cover the bowl and chill in the refrigerator for at least 1 hour.
  2. In a blender, combine the simple syrup and mangos and blend until smooth.
  3. Pour the mixture into the ice cream maker's container and churn according to directions.  Freeze in an airtight container for at least two hours before serving.

Wednesday 29 May 2013

Whole Wheat Bread

I love having the smell of fresh baked bread in my house and there are few things as satisfying as eating  a fresh piece of bread with melted butter all over it.  I must admit I am not a huge fan of the kneading involved in making bread from scratch but I found a recipe that looked simple enough that I decided to try using the bread hook on my stand mixer instead of doing it by hand.  It worked well and raised very nicely.

Whole Wheat Bread

2 1/2 cups very warm water
1 tbsp lemon juice
3 tbsp honey
2 tbsp oil
1 tsp salt
1tbsp instant yeast
2 cups white flour
3 cups whole wheat flour
  1. Stir together the water, lemon juice, honey and oil in a bowl.
  2. In a large bowl stir together the flours, salt and yeast.
  3. Pour the wet mixture into the dry and stir until combined.
  4. Either knead for 10 minutes or use a bread hook on a stand mixer for about 5 minutes.
  5. Cover the bowl with a clean tea towel and allow to double in size (about 45 minutes to 1 hour).
  6. Punch the dough down and form into loaves (makes 3 regular sized loaves).  Place the loaves in well greased pans and allow to rise for 30-45 minutes.
  7. Bake at 350 for 30-40 minutes.

Saturday 25 May 2013

Carrot Bran Muffins

Like everyone, I seem to go in vegetable phases and recently we have been eating a lot of carrots whether it is raw, cooked or in baking.  Today I decided I would try to use up some bran I have had in the pantry for a while and since my horse is on a diet I thought making carrot bran muffins for me to eat would be a perfect way for me to save him the calories.  Lucky for me, Libero does not have a computer and I am pretty sure he can read.  He would not be happy to see that I made muffins instead of spoiling him.

I love having a muffin stash in the freezer because they are so handy for a quick snack or breakfast on the run.  Since I have a new born quick food that is easy to grab is a necessity.  The recipe was quick to prepare (a must at the moment) and tastes great.

Carrot Bran Muffins

1 1/2 cups flour
1 cup bran
1/2 cup packed brown sugar
1 1/2 tsp cinnamon
1 1/4 tsp baking powder
1/2 tsp baking soda
1/2 tsp salt
2 eggs
3/4 cup butter milk
1/2 cup canola oil
2 tbsp molasses
1 cup raisins
1 1/2 cups grated carrots
  1. Mix together the dry ingredients together in a large bowl.  In a separate bowl combine the buttermilk, oil, molasses and eggs.
  2. Stir the wet ingredients into the dry ingredients until everything is just moist.
  3. Fold in the raisins and grated carrots.
  4. Divide the batter into muffin tins. (Makes about a dozen).
  5. Bake at 350 for 25-30 minutes or until a toothpick comes out clean.

Tuesday 21 May 2013

Raspberry Montreal Marinade

I know it may be a little early for some people to think of barbecuing but in our house it is more of a year round thing.  I love being able to cook meats easily with not much fuss for clean up.
This great tasting marinade makes a big batch so you can keep it in the fridge or freeze it in smaller portions for later use.  You can use a home made steak spice mix or go for the easier store bought variety.  It goes well with many different types of meats and taste nice on potatoes too.

Raspberry Montreal Marinade

2 cups olive oil
1/2 Montreal steak spice
1/3 cup honey mustard
1/3 cup raspberry vinegar
  1. Whisk the ingredients together.
  2. Marinate the meat for at least two hours before grilling.

Wednesday 15 May 2013

7 Up Cake

My grandmother made this cake once when I was growing up and a couple years ago I decided to try to find the recipe.  When I finally got around to making it, I was very happy that it was as tasty and moist as I remember.  I don't usually like posting recipes involving packaged mixes but I thought this could be an exception.  It is too tasty not too and it is nice to have easy things on hand for last minute guests.

7 Up Cake

1 box vanilla cake mix
2 small boxes lemon pudding
4 eggs
3/4 cup vegetable oil
1 can 7 Up
1 tsp vanilla
  1. Put the cake mix in a large bowl and add the pudding. Mix these dry ingredients together well.
  2. Add the eggs and beat well.
  3. Add the oil, 7 Up and vanilla.  Stir to combine.
  4. Pour into a pan and cook at 325 for 40-45 minutes.
  5. Allow to cool and ice if you would like.

Friday 10 May 2013

Baked Asparagus with Balsamic Butter Sauce

I love using balsamic reductions on different vegetables.  I wanted to try something new with asparagus the other night so I decided to try it with a balsamic reduction.  The asparagus was amazing and the remaining reduction is being saved to use again tomorrow night for a salad or on some other vegetables.

Baked Asparagus with Balsamic Butter Sauce

1 bunch asparagus
salt and pepper
cooking oil
2 tbsp butter
1 tbsp balsamic vinegar
1 tbsp soy sauce
  1. Preheat the oven to 400.
  2. Break the woody ends off the asparagus and toss with oil, salt and pepper.
  3. Place in a baking dish and bake for 12 minutes.
  4. While the asparagus is in the oven, melt the butter in a saucepan.  Once it has melted add the balsamic vinegar and the soy sauce.  Bring it to a simmer and allow it to reduce while the asparagus is baking.
  5. Pour the reduction over the asparagus just before serving.

Monday 6 May 2013

Cocoa Puffed Wheat Squares

Sometimes the easiest recipes make the yummiest treats.  This is easy to through together at the last minute and has always been one of my favourite guilty pleasures from childhood.  Strangely enough I always thought they would be hard to make.
I remember having it as a snack at an ex's parents house and asking his mom for the recipe.  I was surprised how easy it was to make and it is pretty easy to clean up after making it too.
Growing up we would always have rice crispy squares but I always hated having to scrub the pot afterwards to remove the marshmallow goo.  As long as you soak this pot, it is really easy to clean.

Cocoa Puffed Wheat Squares

8 cups puffed wheat
3 tbsp cocoa powder
1/3 cup corn syrup
1/3 cup butter
1/4 cup packed brown sugar
  1. Measure out the puffed wheat into a bowl.
  2. Combine the other ingredients in a saucepan on the stove.  Melt the ingredients together over medium heat.
  3. Pour the chocolate syrup over the puffed wheat and stir with a spatula until the puffed wheat is coated.
  4. Using a spatula press the puffed wheat into a 9x9 inch greased pan.

Tuesday 30 April 2013

Warmed Marinated Olives

For as long as I can remember I have been a huge fan of olives.  Normally I will just but them already marinated, bulk at the grocery store.  I came across this recipe in one of my cookbooks and thought it would be easy enough to make so I thought I would give it a try.  They were very easy to make and the flavour was amazing.  It is a perfect appetizer for the summer and really wows guests.

Warmed Marinated Olives

1/2 cup picholine olives
1/2 cup moroccan olives
1/2 cup nicoise olives
1 orange
1 lemon
2 sprigs fresh thyme
1 clove minced garlic
1 tbsp extra virgin olive oil
  1. Rinse the olives under cold water to remove any brine.  Pat them dry with paper towels.
  2. Remove the zest from half of the orange in long thin strips with a citrus zester. Remove the zest from half of the lemon as well.
  3. In a bowl toss the olives with the olive oil, garlic, thyme, orange and lemon zest.
  4. Before serving, sautĂ© them over medium-low heat.  Just enough to bring out their flavours and gently warm them.

Wednesday 24 April 2013

Roasted Garlic and Onion Hummus

I have always enjoyed hummus and found it to be a great way to have some extra protein.  The other day I was eating some hummus with my sister and she had mention how she once bought a caramelized onion hummus that was amazing but hasn't been able to find it since.  I thought that it must be easy enough to make a similar hummus to what she was talking about so I decided to search online for a recipe.  It didn't take me long to find a recipe to try.
It was very simple to follow this recipe and the end result tasted great!  So great that my husband decided to lick the bowl clean so that none of it was wasted.
A thought we had while eating the hummus was they only problem with this one is the time it takes to roast the garlic and onions for the recipe.  Then I thought that it would be easy enough to make enough for a couple of batches for the hummus at once and then freeze.  All you would have to do would be defrost the onion and garlic and through the rest of the ingredients into the blender.  Next time I make it I plan on trying this.  I will let you know how it works out.

Roasted Garlic and Onion Hummus

4 heads of garlic
1 large onion
1-2 tbsp vegetable oil 
1 can chick peas, rinsed
1/3 cup tahini
3 tbsp lemon juice
  1. Preheat the oven to 400.
  2. Cut off the tops of the heads of garlic and remove any of the papery skins from the sides.  Place them each individually on a sheet of tinfoil and drizzle with the vegetable oil before wrapping them up.
  3. Peel and cut the onion into 1/2 inch slices and place them onto a piece of tinfoil.  Drizzle with the oil and wrap it up.
  4. Place the garlic and onion foil packets onto a cookie sheet and bake for about 45 minutes or until they begin to brown.
  5. Once the garlic has cooled squeeze out the cloves into a dish.
  6. In a food processor, combine the garlic, onion, chickpeas, tahini and lemon juice.  Process until it reaches the desired consistency.

Friday 19 April 2013

Creamy Ginger Carrot Soup

I think ginger and carrot go so well together.  I am alway looking for new recipes to blend these two ingredients.  I do not usually make many soups in the warmer weather so while the soup seasons (3 of the four seasons where I live are cold enough for soup) is coming to an end I thought I would try this recipe.  I really liked the result and think it would be a great soup to use as a starter for a dinner party.  It tastes great fresh but it is really nice the next day once the flavours begin to mature.  It freezes well so if you want to make a big batch and save some for later, I am sure you won't be disappointed when you defrost it at a later date.

Creamy Ginger Carrot Soup

1 tbsp unsalted butter
1 spanish onion, coarsely chopped
2 lbs carrots, in 2 inch lengths
pinch of ground cinnamon
8 cups chicken stock
2 tsp fresh ginger root
1/2 c heavy cream
chopped fresh parsley or chives to garnish
  1. Place a heavy bottomed stockpot over medium heat and when it is hot, add the butter.  Once the butter has melted, add the onions and carrots.  Cook until they are tender and lightly coloured, about 10-15 minutes.
  2. Add the cinnamon, ginger and stock. Bring to a boil and then lower the heat allowing it to simmer for 30 minutes.
  3. Remove the solids and place them in a blender. While blending, gradually add the cooking liquid and heavy cream.  
  4. To serve, garnish with extra heavy cream and some herbs.

Sunday 14 April 2013

Cauliflower Celeriac Puree

I am always looking for new ways to use cauliflower and experiment with new ingredients.  I was looking through one of my recipe books the other night and came across this one.  I had never used celeriac (celery root) before but I have always wanted to try it in something.
We were had my in-laws over for dinner the other night and they are always open to trying my experiments so I decided to give it a try.  It tasted wonderful and it is an excellent alternative to regular old mashed potatoes.
If you are wanting to dress it up a little when you serve it, a light dusting of nutmeg looks really nice and enhances the flavours.

Cauliflower and Celeriac Puree

1/2 head of cauliflower 
1/2 celeriac
1/2 fennel
1/4 cream
4 tbsp butter
salt and pepper to taste
  1. Cut the vegetables into pieces and place into salted boiling water.  Cook until very tender.
  2. Drain well and place in a blender with the cream and butter.  Puree until smooth.

Friday 12 April 2013

Waffles

On the weekend there is nothing quite like having a nice, hot homemade breakfast.  One on my favourite breakfasts has to be fresh waffles serves with fresh fruit or a fruit sauce.  Whip cream is an added bonus but not necessary.
I use this recipe all the time.  It is very easy to make and they taste wonderful. Depending on how hungry you are and how many your feeding you might want to make a double batch.  I have one of the 6 inch round waffle irons and it makes about 6 waffles.  If you have extra, they can be frozen in a ziplock bag with parchment paper placed between the waffles.  When you want them all you have to do is take them out and place one in the toaster like you would do with store bought frozen waffles.

Waffles

1 1/2 cups all purpose flour
2 tbsp sugar
1 tbsp baking powder
1/4 tsp salt
2 eggs
1 3/4 cups milk
1/2 cup cooking oil or melted butter
1 tsp vanilla
  1. In a medium bow stur together flour, sugar, baking powder ans salt.  Make a well in the centre of the flour mixture and set aside.
  2. In a separate bowl, beat the eggs slightly; stir in the milk, oil and vanilla.  
  3. Add the egg mixture all at once to the flour mixture.  Stir until just moist (it should still be slightly lumpy).
  4. Pour enough batter onto your waffle iron and cook according to the manufacturer's directions.

Thursday 11 April 2013

White Cake

Every year at Easter my family has a tradition of making a bunny cake.  For me it just isn't Easter without a bunny cake.  I have been in-charge of making the bunny cake for some time no.  It is nothing fancy, just to white cake rounds, some icing and LOTS of Easter candy.  Traditionally it is made from a cake mix but this year I thought I would step outside the box and try making one from scratch.  I didn't want to break from tradition too much so I made a simple white cake.
This recipe makes a nice, moist, fluffy white cake and didn't take too much longer than it would have if I had used a cake mix.  It did feel more gratifying to know that I had made it from scratch.
If you are not a fan or do not have almond extract replacing it with extra vanilla works well.

White Cake

2 3/4 cups sifted cake flour
4 tsp baking powder
3/4 tsp salt
4 egg whites
1 1/2 cups white sugar
3/4 cups butter
1 cup milk
1 tsp vanilla extract
1 tsp almond extract

  1. Measure the flour, baking powder and salt.  Sift the ingredients together three times.
  2. In a mixing bowl, beat together the egg whites until foamy.  Add 1/2 cup sugar gradually, only beating until the meringue will hold up in soft peaks.
  3. In a separate bowl, beat butter until it is smooth.  Cream in the remaining 1 cup of sugar.
  4. Alternately add the in the sifted ingredients and the milk, blending after each addition until smooth.
  5. Mix in the extract(s).
  6. Add the meringue and mix thoroughly into the batter.
  7. Spread the batter into two 9 inch rounds or a 15x10 pan.
  8. Bake at 350 degrees for 30-35 minutes.  Let cool in the pan for 10 minutes and then allow it to cool on a cake rack.